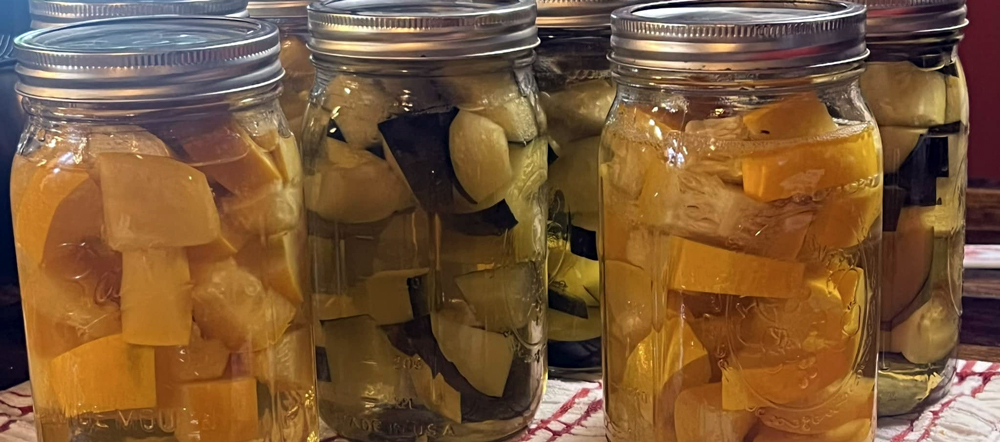
This step-by-step guide walks you through safely canning summer squash. Always prioritize safety and consult your pressure canner manual.
Important: A water bath canner is not safe for home-canning squash—temperatures do not get high enough to safely preserve your harvest.
📌 You can access the USDA Complete Guide to Home Canning for additional reference.
🛠 Preparing for Canning
To make the process as easy as possible, gather all your supplies ahead of time. Ensure your jars, lids, and rings are sterilized and all tools are clean and ready to use.
- 🔍 Check your pressure canner – Ensure all parts are intact, especially the seal.
- ⚙️ Buy extra seals – The seal is often the first part to wear out.
- 🌍 Check elevation requirements – If you've moved, you may need a different pressure weight.
🥒 Step 1: Gather Your Supplies
- 🛢 Fresh summer squash
- 🍳 Pressure canner (not a water bath canner!)
- 🍶 Sterilized jars, lids, and rings
- 🛠 Tools: Funnel, jar lifter, magnetic lid lifter, clean towels
- 🧼 White vinegar (for cleaning jar rims)
- 🍴 Bubble popper (or chopstick/butter knife to remove air bubbles)
- 🧂 Salt (optional, for flavor)
🚿 Step 2: Wash & Prep the Squash
- 💦 Wash squash thoroughly with a vegetable brush.
- 🔎 Remove any blemishes or bruises.
- ❌ Do not peel the squash.
- 🔪 Cut into small cubes (1-inch or smaller).
🔥 Step 3: Sterilize Jars & Prep Equipment
- ♨️ Sterilize jars in boiling water or use a dishwasher’s sterilizing cycle.
- 🧼 Keep all tools clean to prevent contamination.
- 🔍 Check jars for cracks and discard any damaged ones.
- ♻️ Always use new lids—they cannot be reused once sealed.
🥄 Canning Process
Step 1: Raw Pack the Jars
- 🧂 Add 1 tablespoon of salt per quart (optional).
- 🥒 Fill jars with squash cubes, shaking gently to settle them.
- 💧 Pour boiling water over squash, leaving 1-inch headspace.
ProTip: Place jars on a towel-lined surface while filling to prevent slipping or cracking (especially on cool countertops like granite).
Step 2: Remove Air Bubbles
- 🍴 Use a bubble popper or chopstick to release air pockets.
- 📏 Adjust water level if needed—maintain 1-inch headspace.
Step 3: Clean Rims & Seal the Jars
- 🧼 Wipe rims with a vinegar-soaked towel to ensure a clean seal.
- 🛢 Place lids on jars and screw rings fingertip-tight.
ProTip: Keep sterilized lids and rings in hot water until ready to use for a softer, better seal. Use a magnetic lid lifter to remove them from hot water.
⚙️ Pressure Canning
Step 1: Prepare the Canner
- 💦 Add the required amount of water to your pressure canner.
- 🍶 Place jars inside—they should not touch each other.
- ⚙️ If your canner has a rack, use it!
Step 2: Build Pressure
- 🔒 Lock the lid and turn the heat to high.
- 💨 Vent steam for 10 minutes to remove air pockets.
Step 3: Process the Jars
- ⚖️ Set the weight (typically 10 pounds—check elevation requirements).
- 🛑 Ensure the vent is closed.
- ⏳ Once pressure reaches 10 PSI and the jiggler starts moving, process for 40 minutes.
Step 4: Cool Down
- ❄️ Turn off heat and allow the canner to cool naturally.
- 🛑 Do not rush cooling—wait until pressure returns to 0 PSI.
- ⚠️ Carefully remove the weight and open the lid away from your face to avoid steam burns.
📦 Post-Processing
Step 1: Remove the Jars
- 🛢 Use a jar lifter to remove jars carefully.
- 🛏 Place jars on a towel-lined counter to cool overnight.
- 🚫 Do not move jars while cooling.
- 🎵 Listen for the satisfying “pop” as lids seal!
Step 2: Check the Seals
- 🔎 Once cool, press the center of each lid—it should not flex.
- 📊 If a jar doesn’t seal, refrigerate and use within a few days.
Step 3: Label & Store
- 📝 Label jars with the date and contents.
- 🏡 Store in a cool, dark place.
- ♻️ Remove rings if desired—they can be reused.
💡 ProTips & Serving Ideas
🛑 Canning Safety Tips
- 🧊 Never put room-temperature jars in hot water—they may crack.
- 📖 Always follow your pressure canner’s manual.
- 🧼 Keep a clean workspace to prevent contamination.
- 🔥 Watch out for hot surfaces—keep children at a safe distance.
🍽️ How to Use Canned Squash
- 🍳 Pan-Seared Squash – Drain, sauté with butter, garlic, and onions.
- 🥘 Squash Casseroles – Great for hearty bakes.
- 🥞 Squash Patties – Mash, mix with flour & eggs, and fry.
With the right preparation and care, you can enjoy home-canned squash year-round! 🌱🥒


