


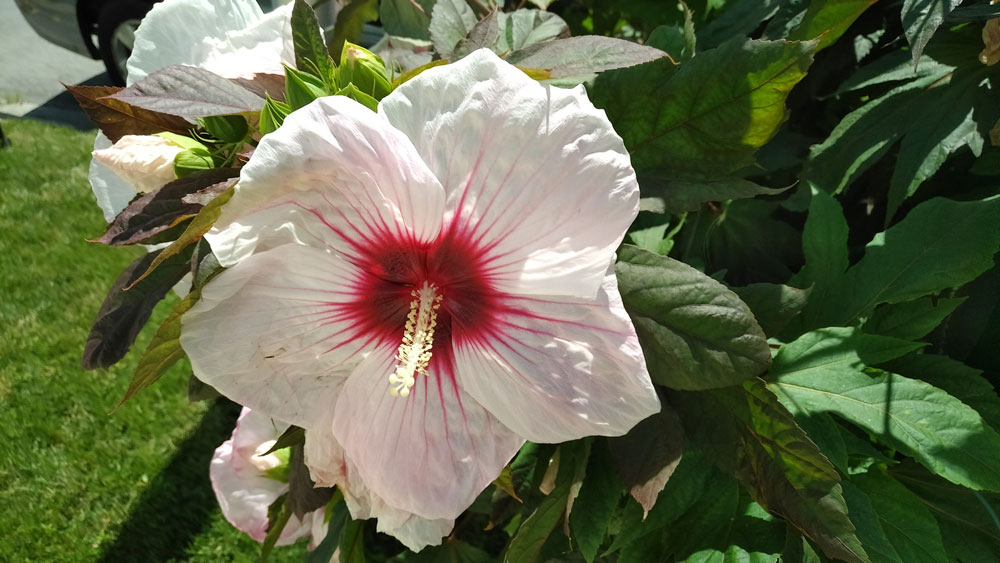
Hardy Hibiscus, (the plural is Hibiscuses) also known as Perennial Hibiscus or Rose Mallow, is a popular choice for gardeners due to its show-stopping, stunningly large blossoms that can reach diameters up to 12 inches and are available in a variety of bright, tropical colors. Do not let their tropical appearance fool you, these resilient perennial plants are well-suited for zones 4-9, making them an excellent, low-maintenance, dependable alternative to Tropical Hibiscus (Cajun Hibiscus).
Varieties like Cherry Cheesecake, Heartthrob, and Copper King offer a range of vibrant colors and striking foliage patterns, adding visual impact wherever planted. Additionally, Hardy Hibiscuses require minimal care; simple tasks such as cutting back the stems and mulching in winter will ensure their longevity and beauty year after year. Their showy, flamboyant flowers, coupled with their adaptability and ease of care, make them a desirable addition to any landscape.
Hardy Hibiscuses produce massive, flashy blossoms from mid-summer until the first frost. And, there is a color for just about every taste, from the whimsical to the distinguished. Each flower blooms for only one or two days, though the supply of new buds is never-ending and will open up daily, always satisfying your Hibiscus fix!
Sun and Soil Requirements:
Hardy Hibiscus thrives in full sun but can adapt to partially shady conditions; however, they will be at the top of their game when receiving at least 6 hours of direct sunlight daily. In hotter climates, these tropical-looking flowers may appreciate some afternoon shade.
The true key to successfully growing Hibiscus, lies in the soil. These plants prefer moist, well-drained soil. While they have a high water requirement, it’s crucial to avoid continuously waterlogged conditions. A good rule of thumb is to keep the soil consistently moist, but not soggy. If you notice the lower leaves turning yellow and falling off, it may be an indication that they are receiving too much water. Cutting back a bit will not only contribute to their good health but will lower your water bill as well.
Seasonal Growth Patterns:
One of the unique characteristics of Hardy Hibiscus is its late emergence in the spring. Don’t be alarmed if you don’t see any growth until mid to late May or even early June. That is actually a good thing, because the buds will not be destroyed with an unexpected late season frost. The resulting performance will be well worth the wait and your Hardy Hibiscus will bloom through fall, often until the first frost, when many other blooming plants have finished their season. Your Hibiscus plant will start its annual growth from the base, with new shoots emerging from the ground.
The Why, When, and How of Deadheading Hibiscus
Deadheading is a simple yet effective technique that can significantly extend the blooming period of your Hibiscus. This process involves removing spent flowers before they form seed pods, encouraging the plant to produce even more blooms.
Why?
Besides prolonged blooming, deadheading, which redirects the plant’s energy from seed production to flower creation, also results in a tidy looking, vibrant and more aesthetically pleasing plant. Removing the spent blossoms can also help to prevent disease as the decaying flowers will not have the opportunity to fall to the soil.
When?
The ideal time to deadhead your Hibiscus plant is immediately after the last flower on a stem has finished blooming. Because each blossom lasts only a day or two, you may want to make this a part of your early morning routine. Coffee, tea, or juice in the garden is a great way to start your day and your plant will be better hydrated, as opposed to waiting until the day is turning hot. Waiting too long to remove the dying flowers will allow seed pods to begin to form, which is Mother Nature’s way of signaling your perennial Hibiscus plant to slow or stop creating its exquisite flowers.
How?
- Identify the spent blooms: Look for flowers that have finished blooming and are beginning to wilt or fall off. If you have flowers on the ground around your plant, pick those up as well.
- Locate the first joint: Find the first leaf joint below the spent flower.
- Make the cut: Using clean, sharp pruning shears or scissors, cut the stem just above this joint at a 45° angle. For the health of all of your plants and the life of your garden tools, you should always clean them, especially if using them to nurture sick plants.
- Remove debris: Clear away any fallen petals or leaves from around the plant to discourage pests and diseases.
Hibiscus Care and Maintenance
Hardy Hibiscus is known for its ability to be absolutely stunning with very little maintenance. Here are some key points for successful cultivation in your own landscape:
- Sunlight: While they can tolerate partial shade, Hardy Hibiscus performs its best in full sun (at least 6 hours daily), producing more abundant blossoms and foliage. In hotter climes, all flowering plants, including Hibiscus, will appreciate some late afternoon shade.
- Soil: These plants are not fussy about soil pH, but definitely prefer moist conditions. Their wetland origins make them appreciate damp areas in the garden.
- Watering: Regular watering is crucial, especially during dry spells. Consistent moisture helps prevent bud drop and keeps the plants healthy. If there is standing water around your plants, reduce the amount of water you use. Deep watering at the base of your Hibiscus plants every few days will result in a much happier and healthier Hibiscus plant.
- Fertilizing: In the spring, top off the soil with an inch of compost or dehydrated manure. Apply a bloom-boosting fertilizer every 14-20 days during the growing season when flower production is high.
Pest Management
Avoid Neem Oil! Hibiscuses are sensitive to Neem Oil and may drop their buds in response. Though generally pest-resistant, Hardy Hibiscus can occasionally face challenges.
Sawflies may sometimes be a problem. Sawflies are tinier than your average house fly and have an orangey-rust-colored spot on their backs. They are easy to spot as they will swarm in large numbers around your Hibiscus plants, laying their eggs on its leaves. When the offspring emerge they will devour the leaves, leaving them in lacy tatters, which can stunt plant growth and totally discourage blooming. If encountered, use Spinosad-based products for control.
Japanese beetles will damage the foliage of your Hibiscus. Though the beetles will most likely not destroy a healthy plant, the damage they do can be unsightly. Some experts recommend underwatering your lawn in June and July, as Japanese Beetles prefer saturated grass for laying their eggs. If attracted to your wet lawn, it’s a short trip to your Hibiscus and other plants. Underwatering your lawn may keep them away completely. If you have a Japanese Beetles infestation, spray with pyrethrin daily, as needed, while the beetles are active.
Preparing Hardy Hibiscus for Winter
As the first frost signals the arrival of autumn, it is also the time to prepare your Hardy Hibiscus for the colder months ahead. While perennial Hibiscus is quite resilient, winter preparation will provide several benefits. Winter preparation will keep your garden looking tidy, prevent disease by removing potentially infected, decaying plant material, allow for easier spring growth, and will ensure that you know where each and every plant is in your landscape.
Preparing your Hardy Hibiscus for winter is a simple task that can significantly impact your plants’ health and appearance in the following growing season. By following these steps, you’re setting yourself and your Hibiscuses up for success, ensuring they will survive harsh winter conditions and appear with vibrant blooms and lush foliage year after year.
You can prepare your Hardy Hibiscus for winter after the first frost when the plant stops making flowers and may start to appear “mushy”. This timing typically aligns with late autumn; however, if you miss the winter window, don’t despair. You can perform the same steps in early spring before the new growth starts to emerge; they will just not be as attractive in your winter landscape.
Steps for Winter Preparation:
Hardy Hibiscus does not provide significant winter food or shelter for wildlife, unlike other perennials, such as bee balm or echinacea. Cutting them back will not be a deterrent to your wintertime birds or other visitors.
- Cutting Back:
- Use clean, sharp shears to cut the stems back to about 2-3 inches above the soil level.
- Remove all the old stem material, as new growth will emerge from the roots, not existing stems.
- Leave a short stub to mark the plant’s location in your garden.
- Mulching:
- After cutting your plants back, add a layer of mulch on and around your plants.
- Use leaves, shredded bark, pine needles, or any organic material available.
- Apply a 4-8 inch layer for insulation in colder zones (Zones 4-5).
- While not strictly necessary in warmer zones like 6B, mulching can still benefit the plant.
Benefits of Mulching
Mulching serves several purposes:
- Mulching insulates the roots against extreme cold.
- Organic mulch will gradually break down, adding nutrients to the soil.
- Mulch will help to retain soil moisture, which can be especially critical in cold winter weather and scorching hot summers.
- Mulching will suppress weed growth.
Spring is Finally Here!
When spring arrives:
- Remove any remaining mulch material.
- Clear away any leftover dried and dead stems from the previous year.
- Be patient - Hardy Hibiscus is a late bloomer, often not showing new growth until mid-June.
Propagating Hardy Hibiscus - A Step-by-Step Guide with Advanced Techniques
Propagating plants is a rewarding hobby that allows gardeners to expand their collection while saving money. This is also a great way to gift friends and family who have admired your Hardy Hibiscus plants. Nothing says “love” like the time and effort you put into a thoughtful gift.
In this article, we’ll explore the process of propagating Hardy Hibiscus using cuttings and employing some advanced techniques and specialized equipment to increase your opportunity for success!
Equipment and Preparation:
- 18-cell, 4-5” deep root maker tray
- Propagation dome (these two items can often be found as a kit)
- Grow table
- Prepared soil mix
- New fogging nozzle (1 gallon per minute)
- Rooting hormone
- Pruning shears
Step 1: Soil Preparation
Begin by filling the 18-cell root maker tray with a well-draining propagation soil mix. The use of a root maker tray can encourage stronger root development in cuttings.
Step 2: Initial Watering
Before adding cuttings, water the soil using a gentle fogging nozzle. This new 1 gallon per minute nozzle provides a fine mist that doesn’t disturb the soil structure. Pre-watering ensures good soil settling and contact with the cuttings.
Step 3: Taking Cuttings
Select a healthy Hardy Hibiscus plant, focusing on its lower limbs for cuttings. Aim for 18 cuttings to fill the tray. Make 45° angled cuts just below the nodes, leaving at least one leaf on each cutting. This angle increases the surface area for root development.
Step 4: Applying Rooting Hormone
Dip the cut end of each cutting into rooting hormone. This stimulates root growth and can significantly increase your propagation success rates.
Step 5: Planting Cuttings
Insert each treated cutting about 1.5 inches deep into each of the soil cells. This depth allows for stability while providing plenty of room for root development.
Step 6: Watering In
Gently water the newly planted cuttings using the fogging nozzle. The fine mist helps settle the soil around the cuttings without displacement or air pockets. The tray’s design allows for adequate water retention, maintaining moisture and humidity.
Step 7: Creating a Humid Environment
Place the dome over the tray, slightly cracking the vents to maintain high humidity while allowing some necessary air circulation. This microclimate promotes root development and prevents the cuttings from drying out.
Step 8: Ongoing Care
Monitor the cuttings daily. Water as needed, typically once more the day after planting. Gradually increase ventilation as the cuttings begin to root and grow.
Using a grow table with bottom heat can speed up the rooting process for many plant species, including Hibiscuses.
The specialized root maker tray promotes air pruning, providing adequate ventilation and oxygenation around the roots; thereby encouraging a more robust root system.
A high-quality fogging nozzle allows for gentle watering of delicate cuttings and seedlings without soil disturbance or displacement.
By following these steps and utilizing specialized propagation equipment, you can increase your success rate when propagating your Hardy Hibiscus and other plants. Remember that patience is key in plant propagation – it may take several weeks to see new growth and root development.
As your cuttings grow, gradually acclimate them to lower humidity by opening the dome vents more over time. Once they show signs of new growth and have developed a strong root system, your rooted cuttings can be transplanted into individual pots or garden beds. With practice and attention to detail, you’ll soon be propagating plants like a pro, expanding your garden and sharing your green thumb with friends and fellow gardeners.
Garden Design Ideas and Companion Plants
Hardy Hibiscus works well in various garden settings, adding a touch of exotic, tropical flair with its massive blooms. Here are some ideas for incorporating Hardy Hibiscus into your own landscape:
- Rain Gardens: Hardy Hibiscus thrives in moist conditions, making it an excellent choice for rain gardens. Its ability to tolerate wet soil can help manage water runoff while providing vibrant color.
- Borders: Use Hardy Hibiscus as a focal point in garden borders. Its tall structure and striking flowers can create a dramatic backdrop for shorter plants, adding depth and interest to your garden design.
- Large Containers: Plant Hardy Hibiscuses in large containers for patios or decks. This allows you to enjoy their stunning flowers up close and move the plants as needed for optimal sunlight exposure. Using a trolley under your large containers will make them much easier to move.
Companion Plants
Pairing Hardy Hibiscus with complementary plants can enhance the overall aesthetic and health of your garden. Consider these companion plants for a harmonious and visually appealing garden:
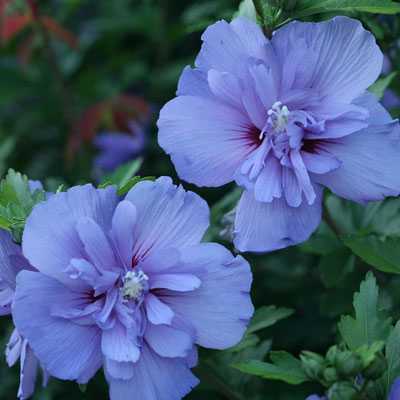
- Baptisia (False Indigo): Is a popular perennial known for its blue-green foliage and tall spikes of small blue, purple, or yellow flowers. Baptisia adds contrasting texture and color that complements the larger blooms of perennial Hibiscus.
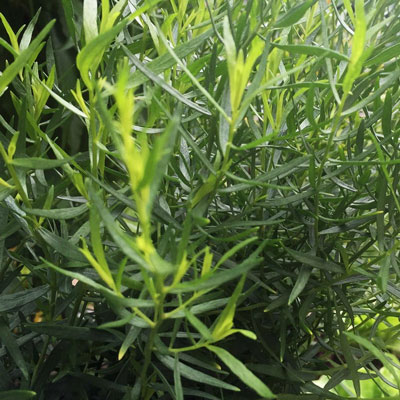
- Coreopsis (Tickseed): With its bright yellow flowers, Coreopsis provides a cheerful contrast to the bold, saturated colors of Hibiscus. A hardy perennial, enjoying similar conditions, makes Coreopsis an ideal companion plant.
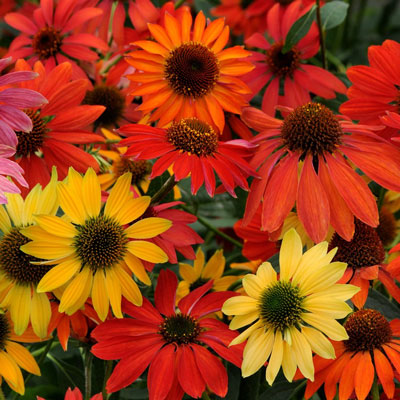
- Echinacea (Coneflowers): Echinacea’s daisy-like flowers and sturdy stems make it a great companion for Hibiscus. The pink, purple, red, orange, white, or even green blossoms of the perennial Echinacea can create a beautiful color palette when planted alongside Hibiscus.
Quick Tips for Your Optimal Success
Be Patient: Hardy hibiscus is often one of the last perennials to emerge in spring, so don’t worry if it takes a while to see new growth.
Support if Needed: In windy areas, use stakes or cages to support the tall stems and large flowers, preventing them from toppling over.
Consistent Moisture: Keep the soil consistently moist, especially during bloom time. Mulching can help retain moisture and reduce watering frequency.
Full Sun: Ensure your Hibiscuses receive adequate sunlight for the best flowering. At least 6 hours of direct sunlight daily is ideal.
Room to Grow: Allow enough space for these fast-growing plants to reach their full size. Plant them where they have room to spread and effectively display their humongous blooms.
Perennial Hardy Hibiscus offers gardeners the opportunity to enjoy tropical-sized blooms in temperate climates. With their easy-care requirements and stunning flowers, these perennials are sure to become a favorite in your garden. By providing the right growing conditions and following these simple care tips, you’ll be rewarded with a spectacular display of dinner plate-sized blooms year after year. Whether you’re designing a rain garden, looking for a striking border plant, or want to add drama to large containers, Hardy Hibiscus is an excellent choice for gardeners seeking low- maintenance, high-impact plants.
Remember, gardening is about patience and care – your efforts now will be rewarded with a stunning display when summer rolls around again.
